
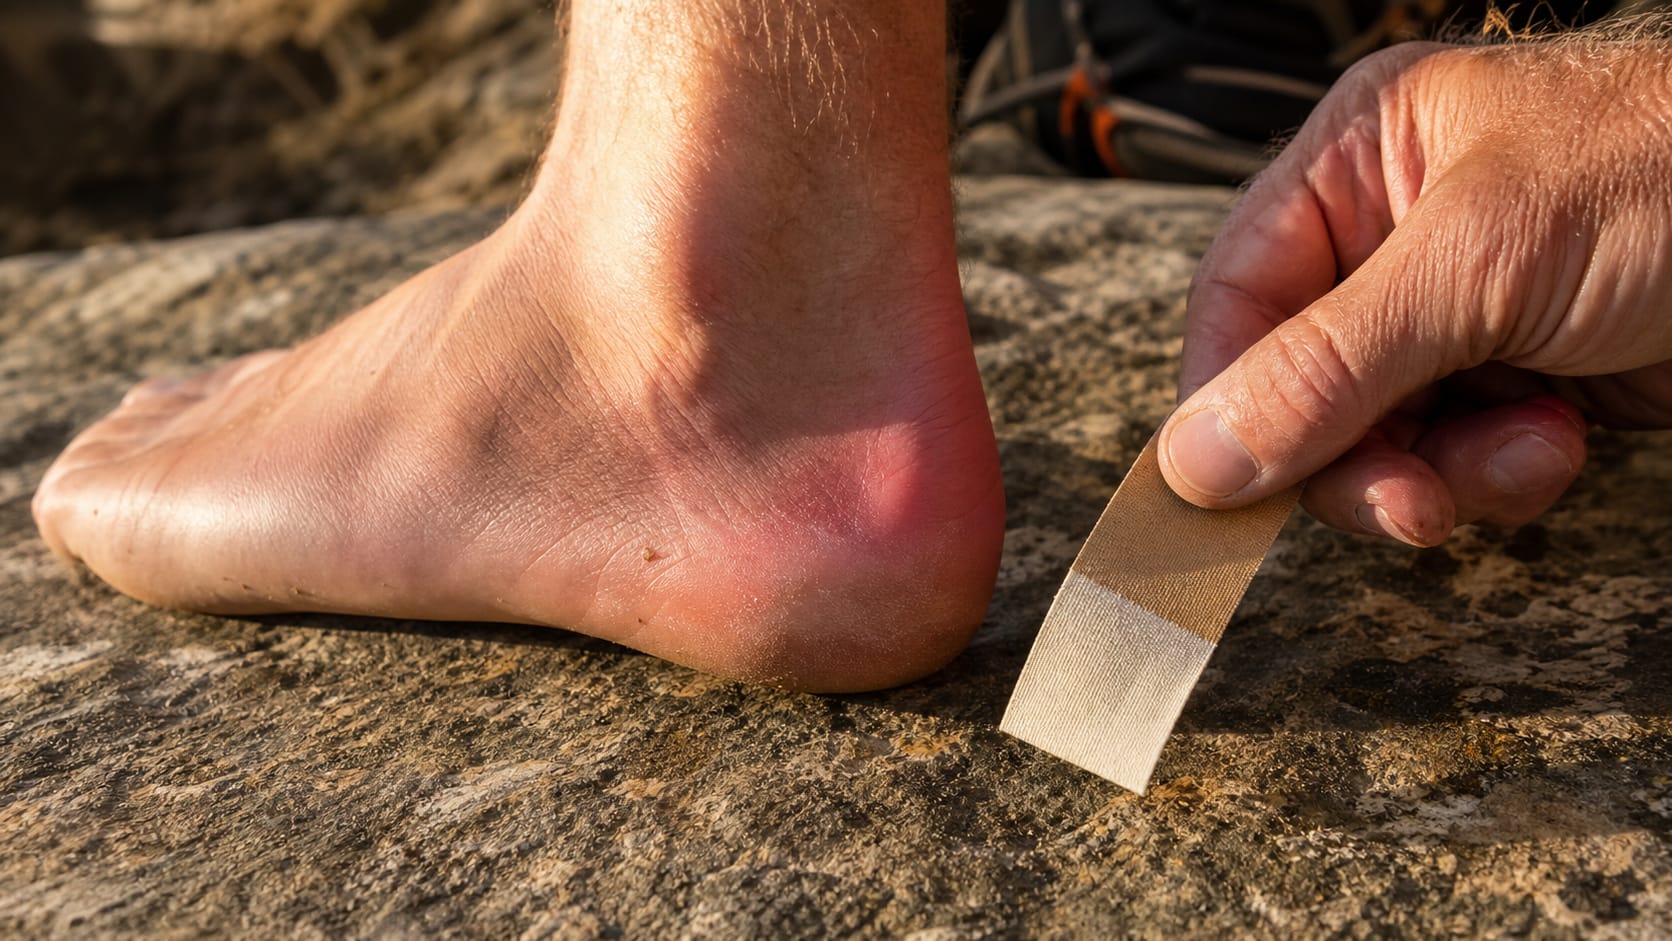
Stop the second you feel warmth, sting, or a tender patch under the sock. Sit on a stone or a curb, take off the shoe and sock, look for redness or a shiny soft spot, dry the foot, smooth wrinkles, apply Leukotape or moleskin flat over the area and one inch past it, change to a dry sock if the current one is damp, then re-lace with a heel lock and walk on. The whole protocol fits inside two minutes.
The signal you are reacting to is mechanical, not painful yet. Friction between skin layers builds heat before it tears anything. If you wait for pain, the layers have already begun to separate and fluid is on its way in. That is why pilgrims who never blister are not lucky. They are reacting to warmth, not to pain.
For the upstream decisions that make hot spots rare in the first place, see our foot care on the Camino pillar guide. For the sock side of the equation, the sock strategy for the Camino covers liners, fibre, and the midday swap.
The two-minute hot spot protocol
The protocol is the same whether you are five kilometres into a stage or twenty. Stop, do not push for the next village. Sit somewhere dry. Pull the shoe off and the sock off in one motion. Towel or air-dry the foot for thirty seconds. Apply a strip of Leukotape directly over the warm spot, flat, with one inch of clean skin covered on every side. If you are carrying a small alcohol wipe, clean the skin first; tape sticks better to dry, oil-free skin.
Swap the sock if it is damp. Re-lace with a heel lock so the foot does not slide forward on the next descent, then stand up and walk a hundred metres before sitting back down. If the area still feels warm after a hundred metres, the tape is in the wrong place. Re-do it.
What you need in your pocket kit
A pilgrim hot spot kit fits in a single zip-lock bag and weighs about 150 grams. Inside: a small roll of Leukotape P or paper tape, a sheet of moleskin or mole foam, a strip of three to four Compeed hydrocolloid patches, a few alcohol wipes, small folding scissors or nail scissors, a sterile needle in its pouch, and a clean spare pair of merino socks. The kit lives in the hip pocket of the pack, not the bottom, so the cost of stopping is twenty seconds and not ten minutes of unpacking.
A hot spot is warmth, tenderness, and pink skin caused by shearing layers under friction. A blister is the next stage: a fluid-filled pocket between the upper and lower skin layers. The hot spot phase often lasts only minutes on a hot afternoon stage, so the sensation of warmth, not pain, is the cue to stop and intervene.
What a hot spot feels like under a Camino sock
It feels like a coin pressing against the skin, or like a small patch of the foot has been left in the sun. Under a sock you may also feel a sting or a pinch when you lift the heel during the swing phase of the stride. None of it hurts the way a blister hurts. It announces itself as a sensation that was not there ten minutes ago.
What a blister looks like once fluid has formed
A blister shows up as a domed pocket of clear or pink-tinged fluid under the top layer of skin. The skin around it is red and warm. Press the centre gently and the dome rebounds. Once fluid is present, you have moved past the hot spot window and into blister treatment on the trail, which is a different protocol.
Why the window is shorter than you think
In peer-reviewed friction blister research the hot spot phase, the stage where shear is happening but no fluid has yet pooled, can last only minutes under continued load. On a 25 kilometre Camino stage with heat, pack weight, and a long descent, a hot spot ignored at kilometre five becomes a full blister well before kilometre ten. The window closes faster the wetter and warmer the foot is.
Run a quick mental scan every kilometre, or roughly every fifteen minutes: warmth in one spot, a sting or pinch, sock bunching, wet sock against skin, a new pebble feeling, or a change in how you weight that foot. Any one of these counts as a hot spot until you prove otherwise.
Six sensations that mean stop now
Warmth in one specific spot. A sting or pinch on the swing phase. A sock that has bunched, folded, or rolled. A wet patch against the skin. A new pebble or grit feeling that does not shake out. A subtle change in how you load that foot, often the body protecting the area without you noticing. Treat all six as hot spots and stop.
Where on the foot hot spots usually appear
The five most reported zones on Camino feet are the back of the heel, the ball of the foot under the big toe joint, the side of the big toe, the side of the little toe, and the tops of the toes where the shoe upper presses on descents. Heels and toe sides dominate; the meseta sun and the long descents into Roncesvalles and Molinaseca do most of the damage.
How heat, rain, and pack weight change the signal
Heat softens the skin and accelerates shear. Wet socks, whether from rain, river crossings, or sweat, soften the skin further and roughly halve the time you have between warmth and blister. A heavier pack increases vertical load on every step, which increases shear on descents. On a hot, wet, or heavy day, scan every fifteen minutes instead of every kilometre.
Sit on something dry, take the shoe and sock off, towel the foot, then choose your patch. Leukotape works for slick hot spots and most heel and toe-side spots. Moleskin is better over raised pressure points where you also need cushioning. A Compeed hydrocolloid patch is the backup for when the skin already looks shiny, lifted, or torn. Apply flat, extend one inch past the red area, then change the sock if it is damp.
Step-by-step in under two minutes
Step one: sit and pull the shoe off, then peel the sock off completely. Step two: towel-dry or air-dry the foot for thirty seconds; if it is sweaty, wipe with an alcohol pad. Step three: cut a strip of Leukotape long enough to cover the warm spot with one inch of clean skin on every side. Step four: lay the tape flat with no wrinkles, press from the centre outward, smooth the edges. Step five: pull on a dry sock and re-lace, finishing with a heel lock to stop forward slide on the next descent.
When to add lubricant or change socks instead of tape
If the foot itself is fine but the sock is soaked, the right fix is a dry sock, not tape. If the same spot has flared on three stages in a row, lubricant (a thin film of petroleum jelly, silicone-based balm, or anti-chafe stick) under the sock can break the cycle for a stage or two while you sort out the underlying fit issue. Lubricant and tape do not stack: tape will not stick over a film of balm.
How to re-lace so the hot spot does not return
The heel lock is the single most effective re-lace for hot spots on the back of the heel and the top of the toes. Lace normally up to the second-from-top eyelet, then thread the lace straight up into the top eyelet on the same side to form a small loop. Pass the opposite lace through the loop, pull both ends snug, then tie. This locks the heel back into the heel cup and stops the foot from sliding forward on descents, which is what creates most heel and toe hot spots in the first place.
Leukotape sticks for two to three days through sweat and showers and is the field favourite for true hot spots. Moleskin cushions raised pressure points and is gentler on intact skin. Compeed hydrocolloid patches are best after the skin breaks or lifts. Carry all three. Each solves a different stage of the same problem.
Leukotape: thin, sticky, sweat-proof
Leukotape P is a sports tape with a rubber-based adhesive built for sweat. It is thin enough to fit inside a snug shoe without changing the fit, sticks for two to three days through showers, and tears cleanly by hand. The downside is that the adhesive can irritate sensitive skin after multiple days; rotate spots and watch for a faint outline of the tape's edge.
Moleskin and mole foam: cushioning over pressure points
Moleskin is felt-backed adhesive sheet, soft on the skin and useful where a hot spot is also a pressure point, for example the side of the big toe inside a slightly narrow shoe. Mole foam is the thicker version, used as a doughnut around a raised blister so the dome is not loaded. Cut moleskin to size with rounded corners; sharp corners peel inside the sock.
Compeed and hydrocolloid: the after-the-fact backup
Compeed and other hydrocolloid patches are designed for blisters where the upper skin layer has already lifted. They mimic a second skin, absorb fluid into the gel, and let the wound heal under a protected dome. They are not the right choice for an intact hot spot: they are thicker than tape, they peel at the edges if the skin underneath is dry, and they cost more per patch. Use them when the skin is no longer intact.
First-time pilgrims walk 25 to 30 kilometres a day for weeks with a loaded pack, often in shoes that are newer than they should be. Long descents into Roncesvalles and Molinaseca push toes forward. Hot afternoons soften the skin. Most blisters on the Camino are not bad luck; they are the predictable result of friction, fit, and moisture on repeat.
Pack weight, descents, and afternoon heat
A pack at 10 percent of body weight or less is the practical ceiling for keeping shear under control. Above that, descents start to hammer the toe box and the heel cup. Afternoon heat softens skin within an hour, which is why hot spots cluster between kilometre fifteen and twenty on hot stages. Finishing earlier in the day is a foot care decision as much as a comfort decision. The rest day decision guide covers when to back off entirely.
Where blisters cluster on the Camino Francés
The Pyrenees descent into Roncesvalles, the long downhill from O Cebreiro toward Triacastela, and the steep drop into Molinaseca produce more first-week blisters than any other stages on the Francés. Heat-dominant stages on the meseta produce ball-of-foot and big-toe blisters from softened skin and sweat. The Galician rain weeks produce heel and side-of-foot blisters from wet socks.
What changes between training walks and the real thing
Training walks are usually shorter, lighter, drier, and on cooler days. The Camino is longer, heavier, often hotter, and never just one day. The combination of consecutive days, full pack weight, and afternoon heat is the part most training plans cannot fully replicate at home. That is why almost every pilgrim should pre-tape their known pressure points on day one, even if those spots never flared in training.
Break shoes in over at least 80 to 100 kilometres before flying. Walk training stages with the full pack. Test the exact socks you will use. Note any pressure points and pre-tape them on day one. Trim toenails the morning of your first stage. Most hot spots on trail trace back to a step that was skipped at home.
Break-in distance and pack-weight conditioning
Modern trail-runners and hiking shoes need around 80 to 100 kilometres of walking to settle in: the upper softens, the insole compresses to your arch, and the lacing reaches the angle that actually holds your foot. Do that walking with the loaded pack, not empty. An empty-pack-broken-in shoe behaves like a new shoe once you add 7 kilograms on top.
Sock and lacing experiments before you fly
Run the last four weeks of training in the exact sock you plan to walk in. If you intend to use a liner, train in the liner. If you plan to use a heel lock, lace that way at home so the muscle memory is in place by the time you reach Saint-Jean. The sock strategy for the Camino covers fibre, liner choice, and the midday swap. The blister prevention guide sits one step earlier in the chain, covering shoe fit and lacing.
Pre-taping known pressure points on day one
Pilgrims who never blistered in training still tend to flare on the Camino in the same one or two spots: outer heel, side of big toe, or top of second toe. If those zones felt warm even once during long training walks, tape them with Leukotape on the morning of day one before the shoe goes on. Pre-taping costs nothing if you are wrong and costs a stage if you are right.
The table compares the three patches a Camino pilgrim should carry, with the stage of damage each one is built for and the practical numbers that matter on trail.
| Product | Best stage to use | Sticks through sweat | Cushioning | Pack weight | Re-apply every |
|---|---|---|---|---|---|
| Leukotape P | Intact hot spot | 2–3 days | Minimal | ~30 g roll | 2–3 days or after a shower |
| Moleskin / mole foam | Raised pressure point on intact skin | 1–2 days | Medium to high | ~20 g sheet | Daily or when edges peel |
| Compeed hydrocolloid | Skin already lifted or torn | 2–4 days | High (gel pad) | ~15 g for a strip of three | Leave on until edges curl, then replace |
Each row solves a different stage of the same problem. The pilgrims who lose stages to blisters usually carry only one of the three.
Frequently asked questions
What is the difference between a hot spot and a blister on the Camino?
A hot spot is the warning before the blister: warmth, tenderness, and pink skin from shearing layers, with no fluid yet. A blister is the next stage, a fluid-filled pocket between the upper and lower skin layers. The hot spot is short, often only minutes on a hot Camino afternoon, which is why experienced pilgrims act on warmth, not on pain.
Is Leukotape, moleskin, or a Compeed patch best for catching a hot spot on the trail?
Leukotape is the strongest pick for catching a hot spot: it is thin, very sticky, and stays put for two or three days of sweat and showers. Moleskin works well over raised pressure points like the side of a toe where cushioning matters. Compeed hydrocolloid patches are reserved for when the skin has already lifted. Most pilgrims carry all three and choose by stage.
How often should I check my feet during a Camino stage?
Stop every 60 to 90 minutes, or roughly every five to seven kilometres, for a quick foot check. Take the shoe and sock off, scan for redness, dry the foot, and re-lace. The break doubles as a hydration and snack stop, so it does not actually cost stage time. On hot or wet days, drop the interval to every 45 minutes.
Should I pop a blister on the Camino, or leave it intact?
If the blister is intact and walkable, leave it covered and let the fluid reabsorb. If it is large, painful, and threatening to burst inside the shoe, drain it from the side with a sterile needle at the end of the stage, keep the skin roof on, then cover it with a hydrocolloid patch. Open blisters need cleaning and daily inspection for infection.
What socks reduce my chance of hot spots on the Camino?
Moisture-wicking socks with no cotton are the baseline: merino wool or synthetic, with smooth toe stitching, snug but not tight. Many pilgrims add a thin liner sock under the main sock so the two layers slide against each other instead of the sock sliding against skin. Carry two pairs and swap to a dry pair at midday on warm stages.
Can I prevent hot spots before I even leave home?
Yes, and that is where most of the prevention happens. Break shoes in over 80 to 100 kilometres with the pack you will actually carry. Identify pressure points during training and pre-tape them on day one of your Camino. Trim toenails the morning you start. Most hot spots on trail trace back to a step that was skipped at home.
External citations
Knapik et al., 'Friction blisters: Pathophysiology, prevention and treatment,' Sports Medicine (1995)
pubmed.ncbi.nlm.nih.gov/7777243The most cited peer-reviewed paper on friction blister mechanics, used here for the skin-shear model behind the hot spot stage and the short window before fluid pooling.
American Academy of Dermatology Association — How to prevent and treat blisters
www.aad.org/public/everyday-care/injured-skin/burns/prevent-treat-blistersDermatological reference for the clinical definition of a blister, when to drain one, and when to seek medical attention; used to anchor the hot-spot-versus-blister distinction.
Rebecca Rushton, Blister Prevention — Hot spots and the friction blister cycle
www.blisterprevention.com.au/blogs/blister-preventionPodiatrist specialised in friction blister prevention; her hot spot framing and tape-versus-hydrocolloid recommendations inform the field protocol used in this article.
La Compostela del Lector
You walked this guide to Santiago.
All 771 km, 0 stages, stamped end to end.